Issues with biological samples.
Biological samples are problematic to image with electrons for several key reasons.
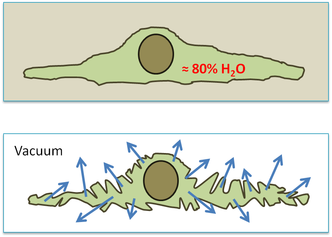
1. The requirement for a vacuum.
Biological material is not naturally resistant to vacuums. The high water content and water permeable membranes/specimen surfaces result in a rapid evaporation of water and subsequent distortion of biological tissue. Dehydration of the sample with solvents typically results in a coagulation of cellular components. This changes the ultrastructure of the sample. Fixation via freezing or chemicals can reduce dehydration artifacts and, combined with the removal of water, prevent sample distortion in the vacuum.
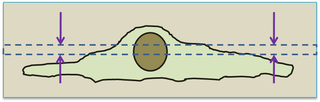
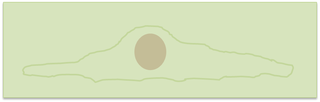
2. Sample size for TEM imaging.
The sample thickness is very important in TEM. Thickness of the sample limits the amount of resolution that can be obtained in an image. The ratio is usually resolution = 1/10 sample thickness. Two thick and the electrons will not penetrate the sample. The sample thickness necessary is often much smaller than the thickness of a cell. Slicing biological tissue that thin is problematic as the tissue usually collapses. Solutions involve freezing the tissue and cutting it while it is frozen (cryo-ultramicrotomy), a technically demanding protocol, or embedding the sample in plastic resins, which provides enough support to permit thin sections of tissue to be cut (ultramicrotomy). Typically the sections are 50-70 nm thick. Thickness of not usually a problem for imaging proteins and viruses, which can be placed on the supporting grid whole.
The sample thickness is very important in TEM. Thickness of the sample limits the amount of resolution that can be obtained in an image. The ratio is usually resolution = 1/10 sample thickness. Two thick and the electrons will not penetrate the sample. The sample thickness necessary is often much smaller than the thickness of a cell. Slicing biological tissue that thin is problematic as the tissue usually collapses. Solutions involve freezing the tissue and cutting it while it is frozen (cryo-ultramicrotomy), a technically demanding protocol, or embedding the sample in plastic resins, which provides enough support to permit thin sections of tissue to be cut (ultramicrotomy). Typically the sections are 50-70 nm thick. Thickness of not usually a problem for imaging proteins and viruses, which can be placed on the supporting grid whole.
3. Contrast
Biological tissue is known as a weak phase sample. The tissue has very low electron density, which results in few electron scattering events and low contrast images. Frozen samples that have no stain can be imaged as there is enough density difference between the sample and surrounding frozen water. For resin embedded samples the density difference is much lower and electron dense stains are necessary, often applied before and after resin embedding.
Biological tissue is known as a weak phase sample. The tissue has very low electron density, which results in few electron scattering events and low contrast images. Frozen samples that have no stain can be imaged as there is enough density difference between the sample and surrounding frozen water. For resin embedded samples the density difference is much lower and electron dense stains are necessary, often applied before and after resin embedding.
4. Conductivity
Biological tissue is, generally, non-conductive. Electrons carry a negative charge and bombarding biological samples with negative charge can cause a build up. In both the SEM and TEM a charging sample can result in image distortion. In the TEM this is most often observed as "drift", which creates a blur in the image. In the SEM charging results in lines occurring across the image and in severe cases it is not possible to image the sample at all. Imaging and microscope conditions can be adjusted to limit the degree of charging but applying a conductive coating to either the sample (for SEM) or the supporting grid/film (TEM) is usually the best method to overcome these issues.
Biological tissue is, generally, non-conductive. Electrons carry a negative charge and bombarding biological samples with negative charge can cause a build up. In both the SEM and TEM a charging sample can result in image distortion. In the TEM this is most often observed as "drift", which creates a blur in the image. In the SEM charging results in lines occurring across the image and in severe cases it is not possible to image the sample at all. Imaging and microscope conditions can be adjusted to limit the degree of charging but applying a conductive coating to either the sample (for SEM) or the supporting grid/film (TEM) is usually the best method to overcome these issues.
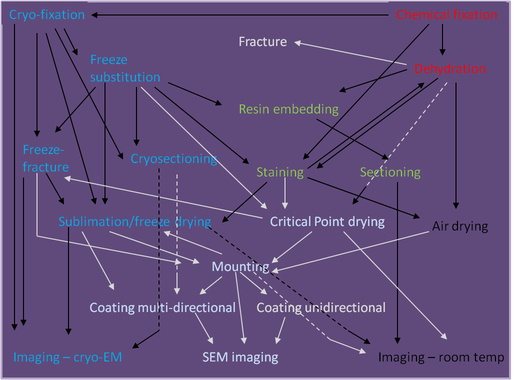
Preparation of biological samples
Transmission electron microscopy
|
Scanning electron microscopy
|